

Sidebars
Heelium comes with two sidebars: Primary is the default left sidebar and Secondary is the default right sidebar. The Sidebar section allows you to create additional custom sidebars and set what sidebars will display for different areas of your site. Navigate to the Sidebar section by going to the Dashboard > Appearance > Theme Options > Sidebars.

To learn how to add content to sidebars, see the Widgets section.
Areas
There are several areas where you can chose what sidebars to display. Make sure the appropriate area has the correct number of columns needed in the Layout section.
- Front Page (Home): the sidebars for the home page.
- Blog Page (Blog): the sidebars for the page where posts will display. (Example blog: Blog)
- Single: the sidebars for single posts.This setting can be overridden on an individual post. (Example post: Markup: HTML Tags and Formatting)
- Archive: the sidebars for category, date, tag, and author archive pages. (Example author archive: Breon Williams)
- Archive — Category: the sidebars for only category archive pages. This setting will override the Archive setting for categories. (Example category archive: Markup Category)
- Search: the sidebars for search pages. (Example search: Theme Options)
- Error 404: the sidebars for Error 404 (Page Not Found) pages. (Example page: Error 404 Page)
- Default Page: the sidebars for pages. This setting can be overridden on an individual page. (Example page: Easy Bootstrap Plugin)
Other areas may appear depending on what plugins are activated. For instance, if the Events Calendar plugin is activated, you will also see options for Event, Venue, and Organizer.
Creating Custom Sidebars
Heelium allows for the creation of custom sidebars without the use of a third party plugin. To add custom sidebars:
- Navigate to the Sidebars section at Dashboard > Appearance > Theme Options > Sidebars.
- Click the Add New button to create a new sidebar. Add a Title and Sidebar ID (both are required, otherwise the sidebar will not show up in the widgets area. The title can have spaces, but the sidebar ID must use hyphens in place of spaces).
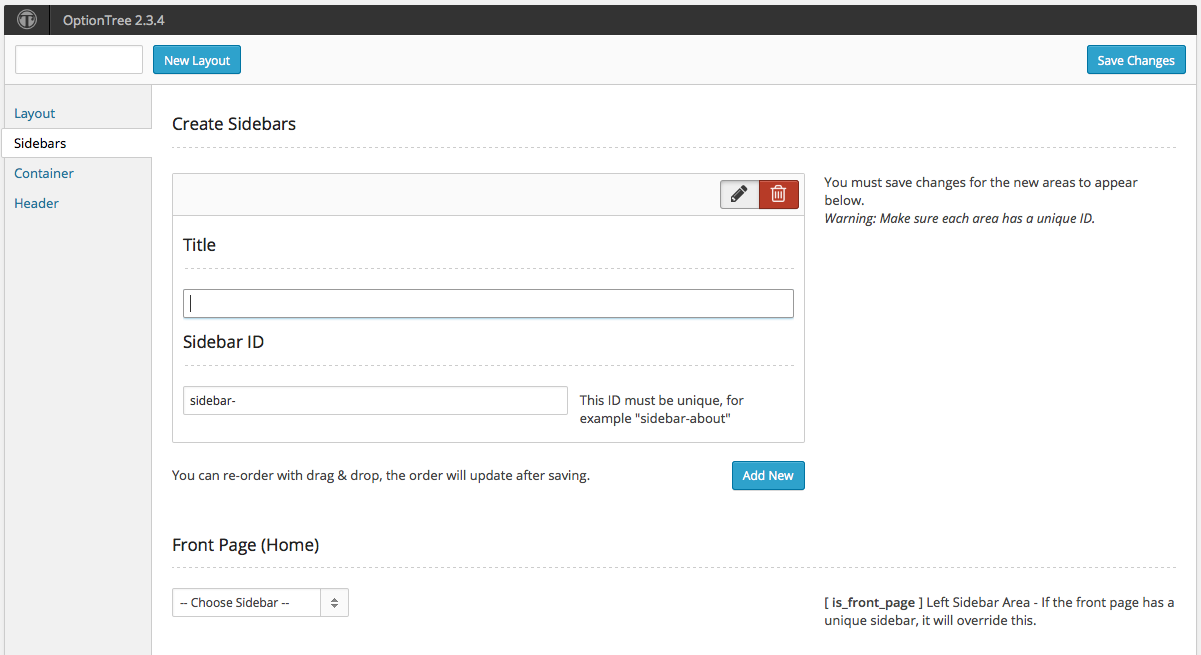
- If you’d like to add more sidebars, repeat step 2.
- Once you’re done creating your sidebars, make sure to click Save Changes in the top right corner of the Theme Options panel.
- Then go to Dashboard > Appearance > Widgets. You should see your new sidebars listed and you can add widgets to each new sidebar as needed.
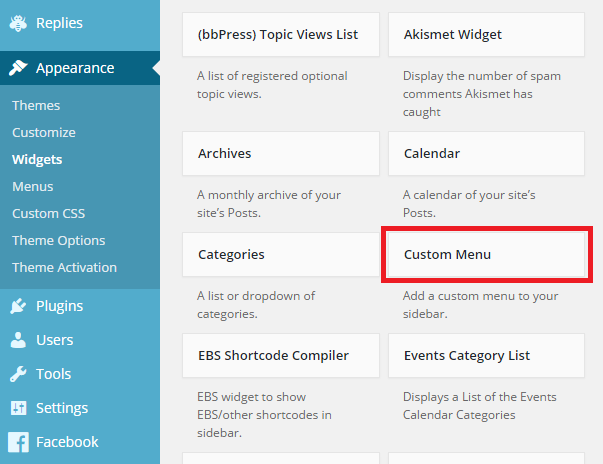
Adding Custom Menus to Sidebars
You can add custom menus to sidebars for additional navigation on pages.
- Go to Dashboard > Appearance > Menus. Create a new menu for your sidebar and add the necessary menu items.
- Then go to Dashboard > Appearance > Widgets. Click on the Custom Menu widget.
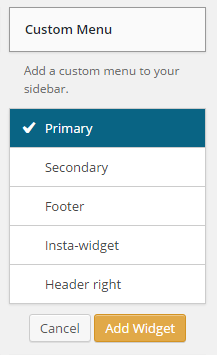
- A menu will show once you click on Custom Menu. Select the sidebar you want to add the custom menu to and click on Add Widget.
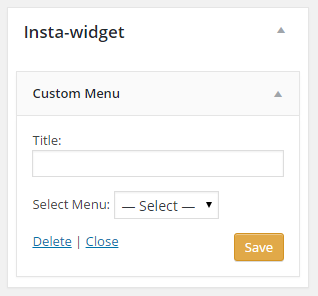
- The Custom Menu widget will now show up in the section of the sidebar you selected. Select the menu you created for that sidebar and give it a title. Click on Save when you are done.
- You can either set the sidebar in the Sidebars section (Dashboard > Appearance > Theme Options > Sidebars), or you can set the sidebar for a specific page by editing the page and choosing the sidebar in the Page Options.
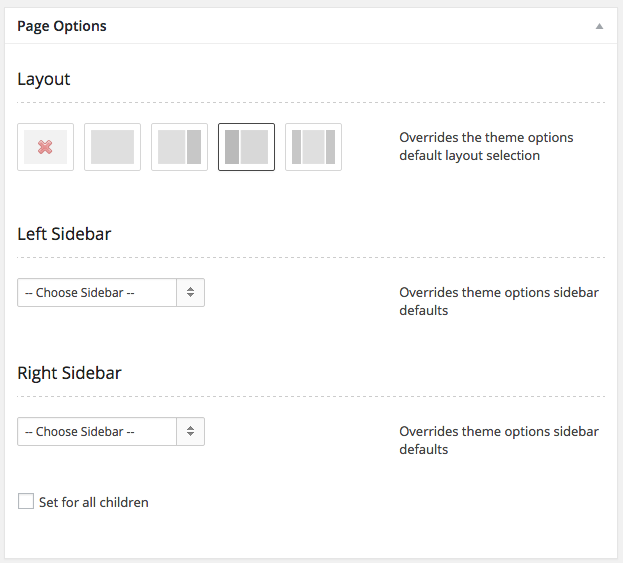
Here you can set how many sidebars the page will have and which ones will be used. There is also the option to Set for all children so child pages will have the same sidebars.